Showing posts with label dbcs. Show all posts

Wednesday, December 8, 2021

DBMS_CLOUD Package in DBCS VM DB

The dbms_cloud package comes built in in autonomous databases. Starting with 19.9 the dbms_cloud package could be installed in other databases as well. This has been documented in 2748362.1. There were no issues encountered while setting up the package in DBCS VM DB following the 2748362.1. The downloaded ssl files were stored in commonstore.
define sslwalletdir=/opt/oracle/dcs/commonstore/wallets/ssl
What was noticable is that unlike in autonomous database certain functionality has been restricted.
Files could be uploaded to storage bucket from the DBCS VM DB.
SQL> exec dbms_cloud.put_object('BACKUP_CRED','https://swiftobjectstorage.uk-london-1.oraclecloud.com/v1/#namespace#/tabledata/exptest.dmp','DATA_PUMP_DIR','exp.dmp');

PL/SQL procedure successfully completed.
The files in a bucket could be listed as well.
SQL> select object_name, bytes from dbms_cloud.list_objects('BACKUP_CRED','https://swiftobjectstorage.uk-london-1.oraclecloud.com/v1/#namespace#/tabledata');

OBJECT_NAME BYTES
----------- ---------
exptest.dmp 2932736
The package allows getting files from storage bucket.
SQL> exec dbms_cloud.get_object('BACKUP_CRED','https://swiftobjectstorage.uk-london-1.oraclecloud.com/v1/#namespace#/tabledata/exptest.dmp','DATA_PUMP_DIR','gotfrombucketexp.dmp');

PL/SQL procedure successfully completed.

ls /u01/app/oracle/admin/ORCL/dpdump/BBAE40CB362D1F2CE0535406F40A0C73/
gotfrombucketexp.dmp


However, unlike in ATP importing and exporting from and to storage bucket fails.
Importing
impdp asanga@uatpdb credential=BACKUP_CRED dumpfile='https://swiftobjectstorage.uk-london-1.oraclecloud.com/v1/#namespace#/tabledata/exptest.dmp' directory=data_pump_dir logfile=impnew.log logtime=all metrics=yes

ORA-39001: invalid argument value
ORA-39000: bad dump file specification
ORA-31640: unable to open dump file "https://swiftobjectstorage.uk-london-1.oraclecloud.com/v1/#namespace#/tabledata/exptest.dmp" for read
ORA-27037: unable to obtain file status
Linux-x86_64 Error: 2: No such file or directory
Additional information: 7
Exporting
expdp  asanga@uatpdb  dumpfile='DEFAULT_CREDENTIAL:https://swiftobjectstorage.uk-london-1.oraclecloud.com/v1/#namespace#/tabledata/expnew.dmp' directory=data_pump_dir logfile=newexp.log exclude=STATISTICS logtime=all metrics=yes

Connected to: Oracle Database 19c Enterprise Edition Release 19.0.0.0.0 - Production
ORA-39001: invalid argument value
ORA-39000: bad dump file specification
ORA-39088: file name cannot contain a path specification
After an SR oracle support stated that this feature is only available for autonomous and not available for other databases. Even if, now dbms_cloud package allows creation of credentials and 19c version of expdp/impdp allow credentails.

Another difference is the creation of external tables. It is possible to create external tables using csv files.
SQL>    DBMS_CLOUD.CREATE_EXTERNAL_TABLE(
          table_name =>'test_ex_table',
          credential_name =>'BACKUP_CRED',
          file_uri_list => 'https://swiftobjectstorage.uk-london-1.oraclecloud.com/v1/#namespace#/tabledata/test2.csv',
          format => json_object('type' value 'csv', 'skipheaders' value '1'),
		  field_list => 'A,B,C',
          column_list => 'A number,
                          B varchar2(20),
                     C number');
       END;
      /

PL/SQL procedure successfully completed.

SQL> select * from test_ex_table;

         A B                             C
---------- -------------------- ----------
       998 abc 998                   20958
       999 abc 999                   20979
      1000 abc 1000                  21000
         1 abc 1                        21
         2 abc 2                        42
         3 abc 3                        63
However, querying an external table created using datapump file fails.
SQL> BEGIN
   DBMS_CLOUD.CREATE_EXTERNAL_TABLE(
    table_name =>'test_dmp_table',
        credential_name =>'BACKUP_CRED',
    file_uri_list =>'https://swiftobjectstorage.uk-london-1.oraclecloud.com/v1/#namespace#/tabledata/datetest.dmp',
        format => json_object('type' value 'datapump', 'rejectlimit' value '1'),
    column_list => 'VERSION VARCHAR2(20), INDATE date' );
    END;
/ 

PL/SQL procedure successfully completed.

SQL> select * from test_dmp_table;
select * from test_dmp_table
*
ERROR at line 1:
ORA-29913: error in executing ODCIEXTTABLEOPEN callout
ORA-29400: data cartridge error
KUP-11010: unable to open at least one dump file for fetch
Same dumpfile and bucket works for ATP.

Monday, November 1, 2021

Enabling Database Management on DBCS VM DB

Database management service could be used to monitor both external and cloud databases. This post shows the steps for enabling database management on DBCS VM DB.
Before enabling DB management there are few pre-req steps that must be completed. DB managment service uses private endpoint to establish connection to the DB. This private endpoint is different to the private endpoint used for data safe. Infact any private endpoints created for data safe won't be visible in the drop down list of the enable DB management window. Therefore, create a database management specific endpoint via Observability & Management -> Administration (under Database Management) -> Private Endpoints.

As the next allow the network where private endpoint reside to communicate with the network where the database reside. Allowing ingress and egress access on port 1521 for private endpoint network is the easiest way to accomplish this. Below is the entries added to the security list associated with the subnet used for database.

Database management need a username and password to connect to the database. The password used must be stored in an OCI vault. The database management service access the vault and get the password to connect to the database. For this case the password for dbsnmp user is stored in the vault secrets and called dbsnmp_secret.

Also connected to vault, the DB managemnt service called "dpd" must granted permission to access the secret in the vault. This could be done by creating a policy which allows dpd service to access the vault.

DBCS VM DB has dbsnmp user precreated as a common user. But the account is in locked status. Unlock the user account and grant following privileges and roles. In this case dbsnmp is used. It is possible to use a different user as well.
alter user dbsnmp account unlock;
alter user dbsnmp identified by pwd_here;

GRANT CREATE PROCEDURE TO dbsnmp container=all;
GRANT SELECT ANY DICTIONARY, SELECT_CATALOG_ROLE TO dbsnmp container=all;
GRANT ALTER SYSTEM TO dbsnmp container=all;
GRANT ADVISOR TO dbsnmp container=all;
GRANT EXECUTE ON DBMS_WORKLOAD_REPOSITORY TO dbsnmp container=all;
That concludes the pre-reqs.


The documentation states that certain features are not available on PDBs but testing showed otherwise.

It could be that documentation is not updated with the latest capabilities and features).
Enabling of DB management could be done via Observability & Management -> Administration (under Database Management) or clicking the enable button in the database detail page.

This will open the enable database management dialog and will be pre-filled with details of the database. By default the service name is populated with the service name of the cdb$root (however, it is possible give the service name of the PDB as well and enabling DB managment at PDB level.

The main consideration is which option to choose. Full management gives lot more capabilities at a cost whereas basic appears to be free.

Once the enable database managment button is clicked, montior the enabling of database management via work requests.


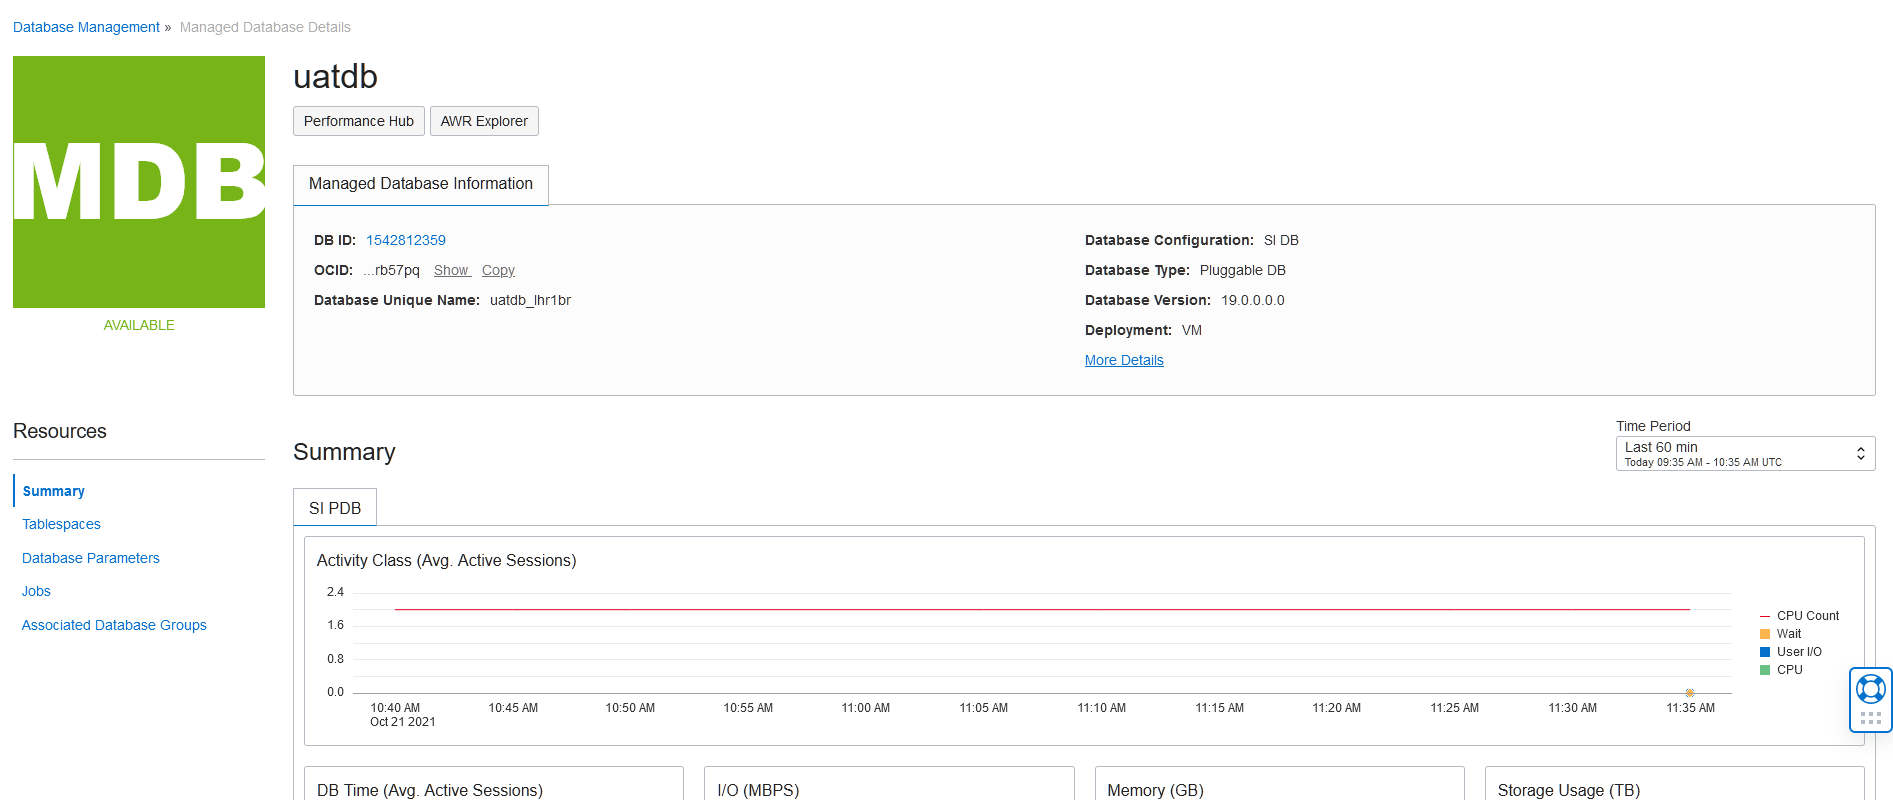
Once enabled, the DB management will populate the metrics charts.

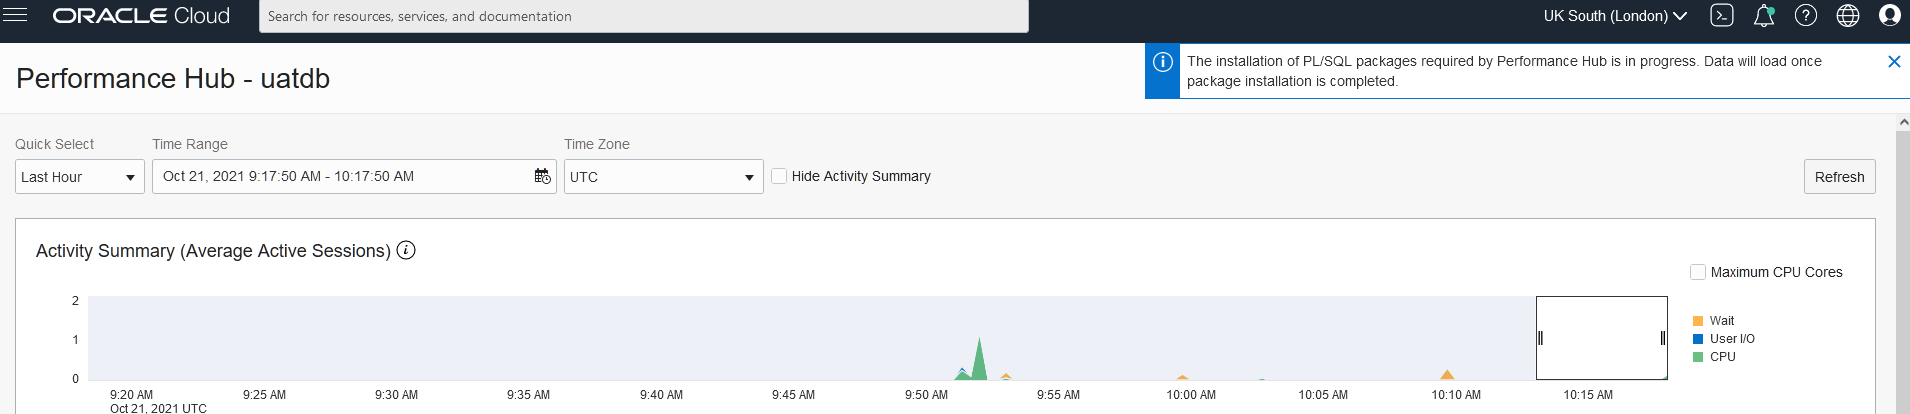
The DB Management service will automatically install necessary PL/SQL packages needed the very first time performance hub is used. This is not done in subsequent uses of performance hub.

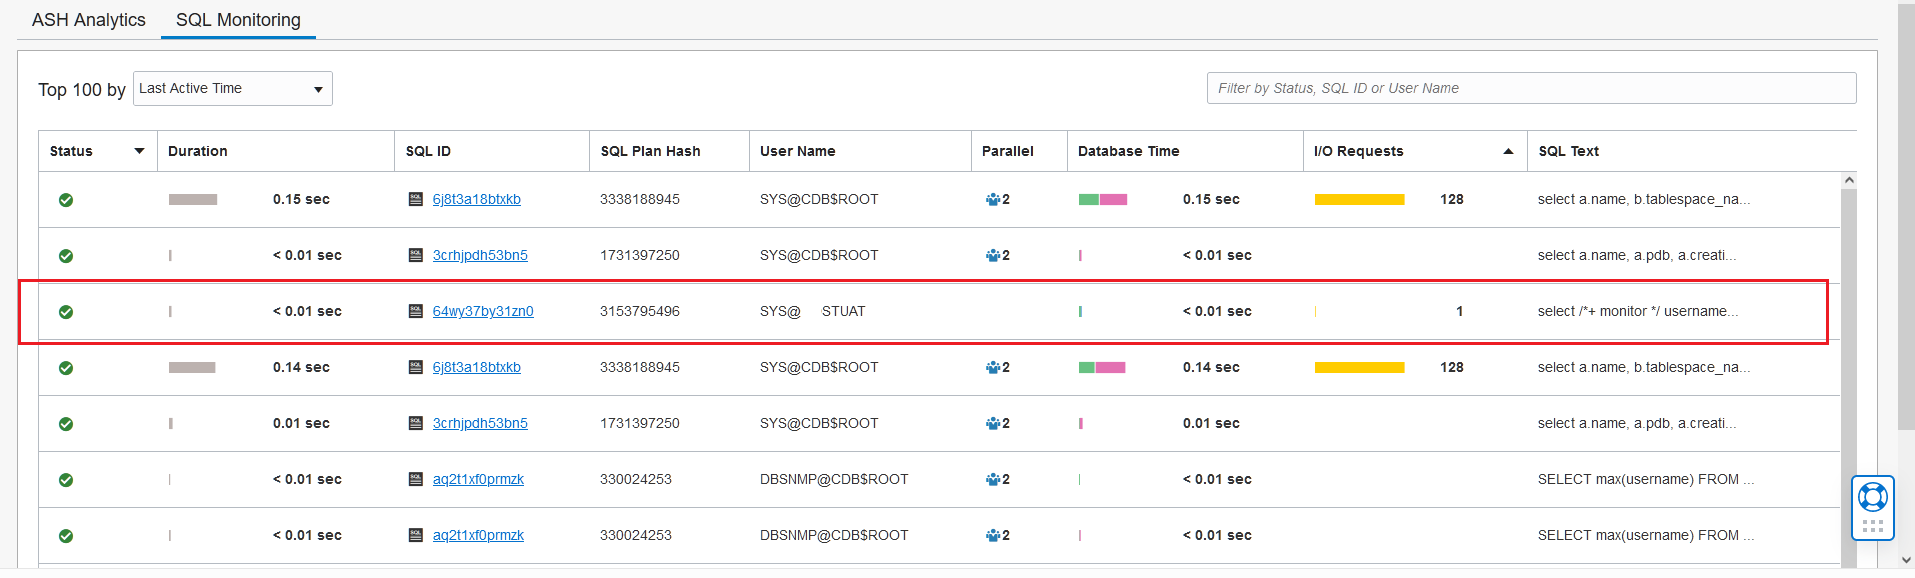
Could also view the ASH Analytics and SQL monitoring sections. This is true even when PDB service name was used for enabling (document states not available for PDBs).

If full option was selected, then there would be additional tabs such as addm and blocking sessions.

If cdb service was used during the enabling process then the SQL monitor will show both pdb and cdb related SQLs.

On the otherhand if PDB service name was used during enabling then only PDB related SQLs are shown.

DB management enable with basic could be later changed to full and vice versa. Also a connection to the cdb could be changed to PDB and vice versa.

With the full option additonal capabilities are enabled and could be access via Observability & Management -> Fleet Summary. Below screenshots show Fleet summary showing PDB related details (when PDB service name was used for enabling)

Below shows the fleet summary page when CDB service was used for enabling.

When CDB is viewed on the fleet summary, no PDB related information is shown. It could be this fact that the documentation states when it says "currently not available for PDBs".
As a final note, when performance hub is used, every time a monitoring SQL runs it generates an audit record if auditing policy includes "select any dictionary" (CIS audit policy requires this). Below is a sample of such audit records.
EVENT_TIMESTAMP                ACTION_NAM OBJECT_NAME      DBUSERNAME OBJECT_SCH OS_USERNAM SQL_TEXT
------------------------------ ---------- ---------------- ---------- ---------- ---------- --------------------------------------------------------------------------------
20-OCT-21 02.16.08.785885 PM   SELECT     GV_$SQL_PLAN     DBSNMP     SYS        odosvc     select /*+ opt_param('parallel_execution_enabled',
20-OCT-21 02.16.08.790501 PM   SELECT     X$KQLFXPL        DBSNMP     SYS        odosvc     SELECT /*+ opt_param('parallel_execution_enabled','false') */
20-OCT-21 02.16.08.790909 PM   SELECT     GV$SQL_PLAN      DBSNMP     SYS        odosvc     SELECT /*+ opt_param('parallel_execution_enabled','false') */
20-OCT-21 02.16.08.791373 PM   SELECT     GV_$SQL_PLAN     DBSNMP     SYS        odosvc     SELECT /*+ opt_param('parallel_execution_enabled','false') */
20-OCT-21 02.16.08.800590 PM   SELECT     X$KQLFXPL        DBSNMP     SYS        odosvc     select /*+ opt_param('parallel_execution_enabled',
This has been mentioned in a previous post as well. Take neccessary actions to avoid rapid growth of audit records due to the use of performance hub.

Wednesday, October 27, 2021

Backup Configuraiton in DBCS VM DB With Data Guard

There is an earlier post on how to setup data guard association on DBCS VM DB.
This post looks at the backup configuraiton of such a setup.
Primary has automatic backup enabled.

The new data guard configuration is created for database between two regions.
DGMGRL> show configuration

Configuration - londb_lhr1cq_londb_cwl1zf

  Protection Mode: MaxPerformance
  Members:
  londb_lhr1cq - Primary database
    londb_cwl1zf - Physical standby database

Fast-Start Failover:  Disabled

Configuration Status:
SUCCESS   (status updated 48 seconds ago)
Once the DG association is created the archive log deletion policy on primary gets changed from
CONFIGURE ARCHIVELOG DELETION POLICY TO BACKED UP 1 TIMES TO 'SBT_TAPE';
to
CONFIGURE ARCHIVELOG DELETION POLICY TO BACKED UP 1 TIMES TO 'SBT_TAPE' SHIPPED TO ALL STANDBY;
Even though backed up time appears before the shipped clause this has not prevented archvie logs getting deleted.
On the standby the archive log deletion policy is
CONFIGURE ARCHIVELOG DELETION POLICY TO SHIPPED TO ALL STANDBY;
Even though primary had automatic backup enabled, the standby is created with automatic backup disabled.

There is no simple way to enable automatic backups on standby. There's no "configure automatic backup" button on the standby database detail page. Even with terraform there's no way to enable automatic backup on the standby database (this could change in the future).


Only way to enable automatic backup on the standby is to make a switchover to the standby. After the switchover the "configure automatic backup" button will appear on the new primary (old standby) database detail page. However, automatic backup will still be disabled.

Enable automatic backup on the new primary (old standby).

Afterwards automatic backup enabled on the new primary (old standby).

The archive log deletion policy on the new primary (old standby) gets changed from
CONFIGURE ARCHIVELOG DELETION POLICY TO SHIPPED TO ALL STANDBY;
to
CONFIGURE ARCHIVELOG DELETION POLICY TO BACKED UP 1 TIMES TO 'SBT_TAPE' SHIPPED TO ALL STANDBY;
after the first automatic backup has taken place.
The old primary (new standby) will have automatic backup enabled status.

However, it doesn't take full or incremental backups. Only the hourly archive log backups run with automatic backup enabled on the standby.
Furthermore with standby in mount no manual backups are not allowed using dbcli.
dbcli create-backup -bt ArchiveLog -i dd2a13fb-46cf-4a51-9cce-485b7ff4ace1
DCS-10089:Database londb is in an invalid state '{ nwpdbvm: Mounted (Closed) }'.
There's also no way to disable automatic backup on a standby that already has it enabled. Same as enabling, DB must be made a primary DB to disable the automatic backups.

Related Posts
Data Guard on OCI PaaS DB
Data Guard With OCI PaaS DB (DBaaS) Primary and Standby on IaaS

Monday, October 25, 2021

Creating Database from Backup of a Terminated DB System

Once a DBCS VM DB system or a database is terminated there's no way to recover it. At least that's the officail word from Oracle and stated in bold before termianting a DB or a DB system. For DB

For DB system.

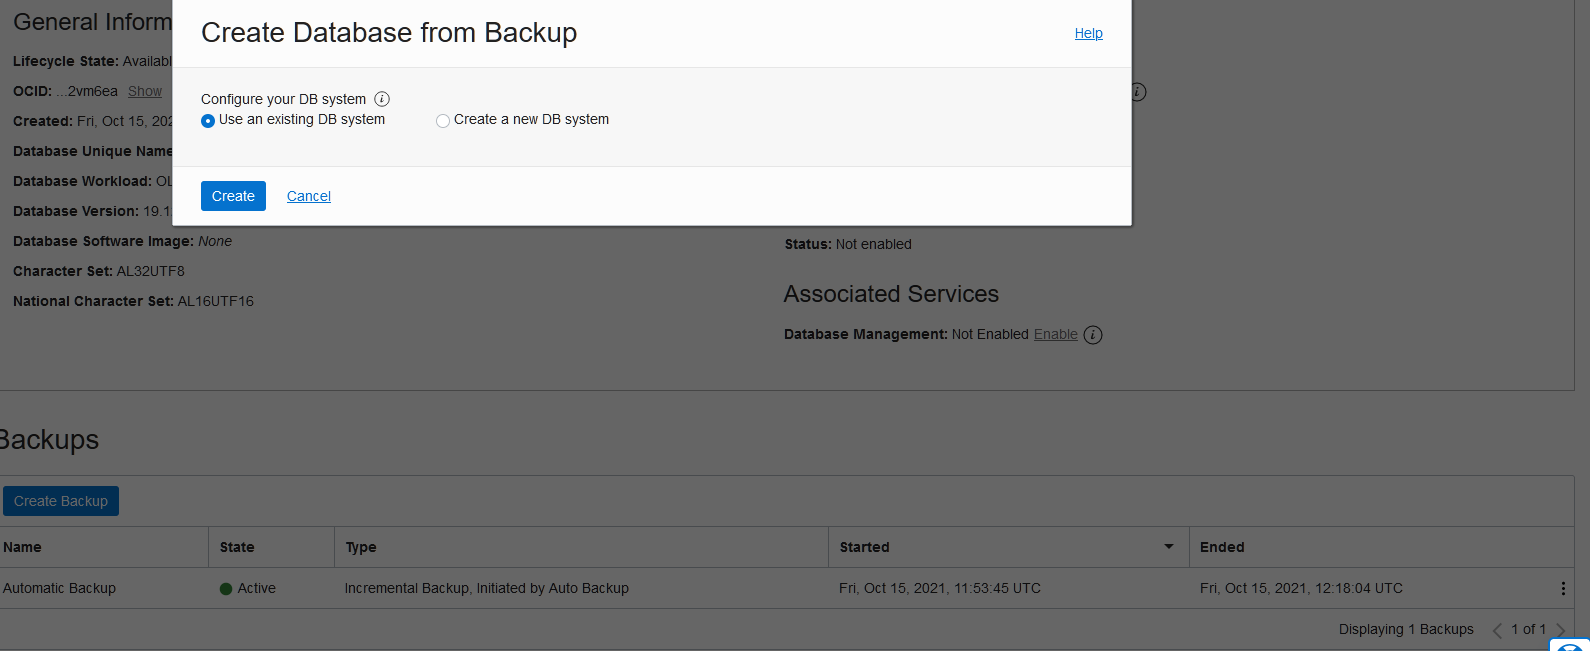
There are two options for creating a database from backup when database is up and running (before termianted). One is using the "Create database from backup" button. This gives sevearl options such as last backup or from a specified timestamp.

Other method is selecting a specific backup and then clicking the three dots at the end and choosing the create database. This only gives two options.

When a DB System is terminated it still listed in the DB system page with a terminated state.

After some time it's removed from the DB System page. During this time between being terminated and removed from DB System page it is possible to create a database from backup of the terminated database. This method is not offical. It could change in the future. But at the time of writing it is possible.
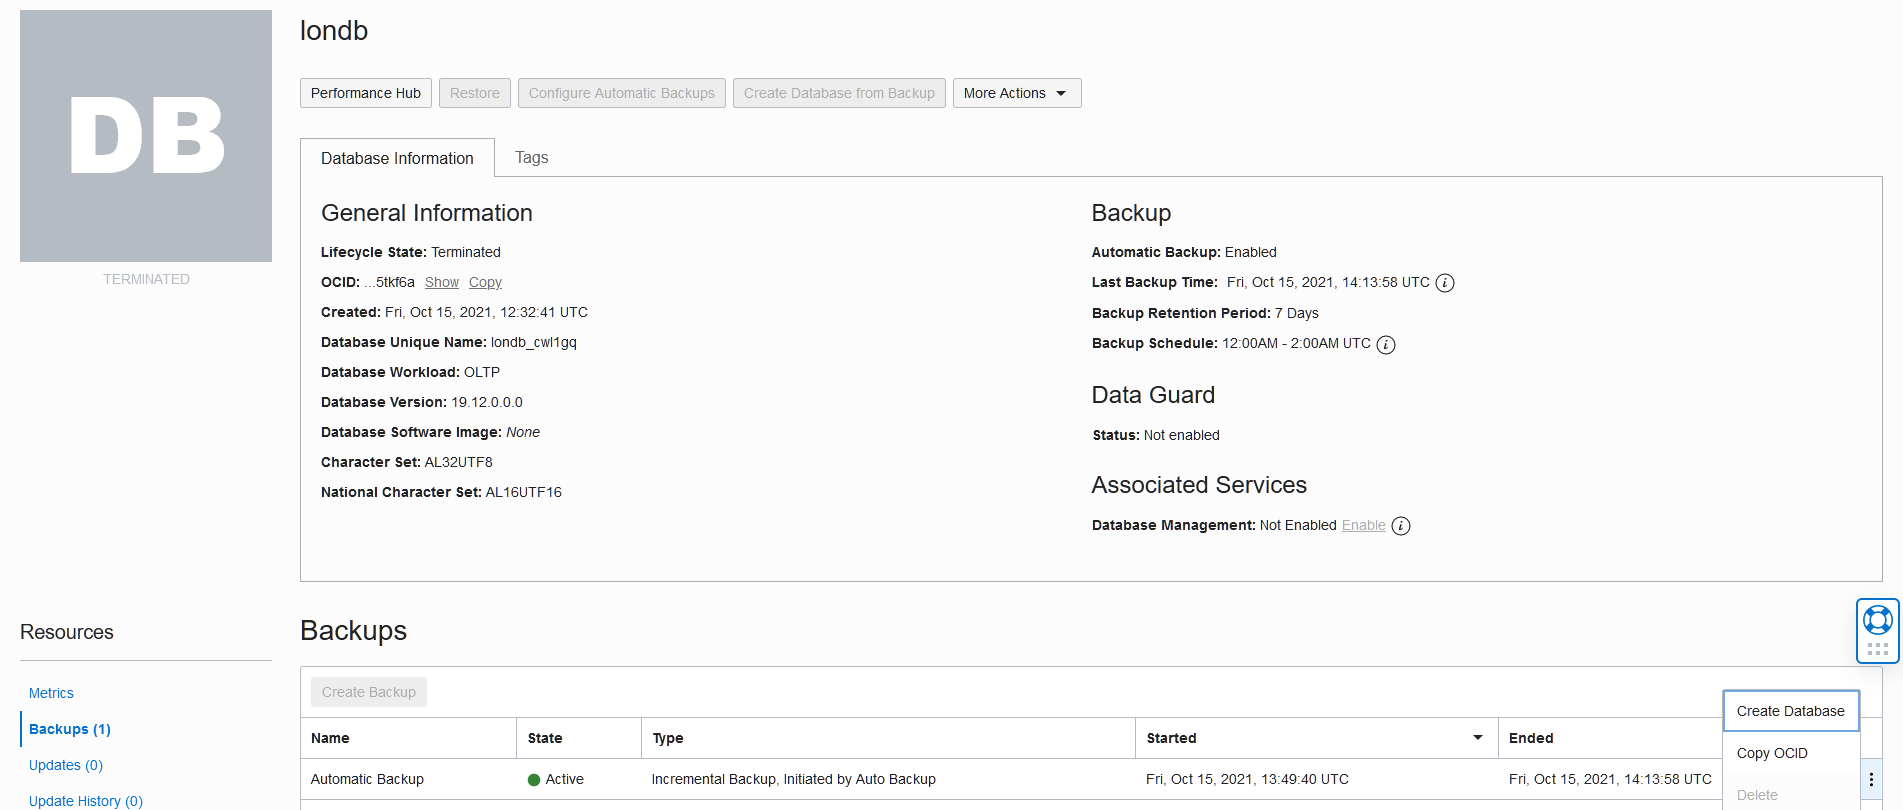
Even though database is terminated, it could traversed using the links. Most of the options and buttons are grayed out.

"Create database from backup" button is grayed out but on an individual backup the "create database" item is available. Select "Create Database" option. The backup used in this case is an automatic backup.

During the creationg is is possible to use a different ssh key and storage type (ASM could restored as LVM). However, the hostname must be different to that of the terminated DB system's node name. Using the same hostname prefix could result in confliciting node names and DB creation fails.

Restored database could have a different name. But the TDE wallet password of the terminated DB system must be specified. Withuot this the restore will fail.


A new DB system will start provisioning.

Work request shows the steps and last step is the restoring of the database.

If no issues encountered such as duplicated vm names, wrong TDE passwords the restore will complete without error.

The DB system provisioning will complete and DB system will be available for login.

Three different tests were done using this method. One had a DB system created with ASM but restored to LVM. Another had a LVM DB System restored as LVM DB System. Third was a DB System that had a standby DB at the time of the termiantion. The backup used for restore was created while it was in primary role. The restored DB system had a read/write DB.

If the terminated database is not visible on the DB system page then this method is a non starter.
This is not a supported method. If it fails no pointing in contacting Oracle support as Oracle has stated once terminated all is gone, including automatic backups.

Monday, October 4, 2021

Patching OS in DBCS VM DB Using DBCLI

There's an earlier post which shows updating and patching the OS. This method used yum to update the OS. It is still valid and available in documentation as well.
Recently Oracle introduced a new way to patch the OS, that is using the dbcli. The dbcli is the tool to use if patching the DB is done using command line. With this new enhancement same tool dbcli could be used to patching and updating the OS as well.
1. To check if any OS updates are available run the get-availableospatches command. If patches are not available updateAvailable will show false.
#  dbcli get-availableospatches -j
{
  "updateAvailable" : false,
  "rebootIsRequired" : false,
  "updateableRpms" : null,
  "installedRpms" : null
}
2. If updates are available then it will show updateAvailable true and also if a reboot is required after update.
dbcli get-availableospatches
Update Available     Reboot Required
-------------------- --------------------
Yes                  Yes
To get a list of rpms update use -j option.
bcli get-availableospatches -j
{
  "updateAvailable" : true,
  "rebootIsRequired" : true,
  "updateableRpms" : [ "bind.x86_64::32:9.11.4-26.P2.el7_9.5", "bind-export-libs.x86_64::32:9.11.4-26.P2.el7_9.5", "bind-libs.x86_64::32:9.11.4-26.P2.el7_9.5", "bind-libs-lite.x86_64::32:9.11.4-26.P2.el7_9.5", "bind-license.noarch::32:  9.11.4-26.P2.el7_9.5", "bind-utils.x86_64::32:9.11.4-26.P2.el7_9.5", "curl.x86_64::7.29.0-59.0.3.el7_9.1", "device-mapper.x86_64::7:1.02.170-6.0.5.el7_9.5", "device-mapper-event.x86_64::7:1.02.170-6.0.5.el7_9.5", "device-mapper-event-l  ibs.x86_64::7:1.02.170-6.0.5.el7_9.5", "device-mapper-libs.x86_64::7:1.02.170-6.0.5.el7_9.5", "device-mapper-multipath.x86_64::0.4.9-134.0.3.el7_9", "device-mapper-multipath-libs.x86_64::0.4.9-134.0.3.el7_9", "dhclient.x86_64::12:4.2.5  -83.0.1.el7_9.1", "dhcp.x86_64::12:4.2.5-83.0.1.el7_9.1", "dhcp-common.x86_64::12:4.2.5-83.0.1.el7_9.1", "dhcp-libs.x86_64::12:4.2.5-83.0.1.el7_9.1", "dmidecode.x86_64::1:3.2-5.0.1.el7_9.1", "glib2.x86_64::2.56.1-9.el7_9", "glibc.i686:  :2.17-324.0.1.el7_9", "glibc.x86_64::2.17-324.0.1.el7_9", "glibc-common.x86_64::2.17-324.0.1.el7_9", "glibc-devel.x86_64::2.17-324.0.1.el7_9", "glibc-headers.x86_64::2.17-324.0.1.el7_9", "grub2.x86_64::1:2.02-0.87.0.9.el7_9.6", "grub2-  common.noarch::1:2.02-0.87.0.9.el7_9.6", "grub2-efi-x64.x86_64::1:2.02-0.87.0.9.el7_9.6", "grub2-pc.x86_64::1:2.02-0.87.0.9.el7_9.6", "grub2-pc-modules.noarch::1:2.02-0.87.0.9.el7_9.6", "grub2-tools.x86_64::1:2.02-0.87.0.9.el7_9.6", "g  rub2-tools-extra.x86_64::1:2.02-0.87.0.9.el7_9.6", "grub2-tools-minimal.x86_64::1:2.02-0.87.0.9.el7_9.6", "gssproxy.x86_64::0.7.0-30.el7_9", "hwdata.x86_64::0.252-9.7.0.1.el7", "iscsi-initiator-utils.x86_64::6.2.0.874-20.0.5.el7_9", "i  scsi-initiator-utils-iscsiuio.x86_64::6.2.0.874-20.0.5.el7_9", "kernel-devel.x86_64::3.10.0-1160.36.2.el7", "kernel-headers.x86_64::3.10.0-1160.36.2.el7", "kernel-uek.x86_64::4.1.12-124.53.5.el7uek", "kernel-uek-firmware.noarch::4.1.12  -124.53.5.el7uek", "kexec-tools.x86_64::2.0.15-51.0.3.el7_9.3", "kpartx.x86_64::0.4.9-134.0.3.el7_9", "krb5-libs.x86_64::1.15.1-50.0.1.el7", "libcurl.x86_64::7.29.0-59.0.3.el7_9.1", "libgudev1.x86_64::219-78.0.5.el7_9.3", "libipa_hbac.  x86_64::1.16.5-10.0.1.el7_9.8", "libldb.x86_64::1.5.4-2.el7_9", "libsmbclient.x86_64::4.10.16-15.el7_9", "libsss_autofs.x86_64::1.16.5-10.0.1.el7_9.8", "libsss_certmap.x86_64::1.16.5-10.0.1.el7_9.8", "libsss_idmap.x86_64::1.16.5-10.0.1  .el7_9.8", "libsss_nss_idmap.x86_64::1.16.5-10.0.1.el7_9.8", "libsss_sudo.x86_64::1.16.5-10.0.1.el7_9.8", "libwbclient.x86_64::4.10.16-15.el7_9", "libxml2.i686::2.9.1-6.0.3.el7.5", "libxml2.x86_64::2.9.1-6.0.3.el7.5", "libxml2-python.x  86_64::2.9.1-6.0.3.el7.5", "linux-firmware.noarch::999:20210617-999.8.git0f66b74b.el7", "lvm2.x86_64::7:2.02.187-6.0.5.el7_9.5", "lvm2-libs.x86_64::7:2.02.187-6.0.5.el7_9.5", "mokutil.x86_64::15.3-1.0.5.el7", "nettle.x86_64::2.7.1-9.el  7_9", "nfs-utils.x86_64::1:1.3.0-0.68.0.1.el7.1", "nss.x86_64::3.53.1-7.el7_9", "nss-sysinit.x86_64::3.53.1-7.el7_9", "nss-tools.x86_64::3.53.1-7.el7_9", "openldap.x86_64::2.4.44-23.el7_9", "openssl.x86_64::1:1.0.2k-21.0.3.el7_9", "ope  nssl-libs.x86_64::1:1.0.2k-21.0.3.el7_9", "oracle-database-preinstall-19c.x86_64::1.0-3.el7", "pciutils.x86_64::3.5.1-3.0.1.el7", "pciutils-libs.x86_64::3.5.1-3.0.1.el7", "python.x86_64::2.7.5-90.0.3.el7", "python-libs.x86_64::2.7.5-90  .0.3.el7", "python-sssdconfig.noarch::1.16.5-10.0.1.el7_9.8", "redhat-release-server.x86_64::1:7.9-6.0.1.el7_9", "rsyslog.x86_64::8.24.0-57.0.1.el7_9.1", "samba-client-libs.x86_64::4.10.16-15.el7_9", "samba-common.noarch::4.10.16-15.el  7_9", "samba-common-libs.x86_64::4.10.16-15.el7_9", "screen.x86_64::4.1.0-0.27.20120314git3c2946.el7_9", "selinux-policy.noarch::3.13.1-268.0.13.el7_9.2", "selinux-policy-targeted.noarch::3.13.1-268.0.13.el7_9.2", "shim-x64.x86_64::15.  3-1.0.5.el7", "sos.noarch::3.9-5.0.11.el7_9.6", "sssd.x86_64::1.16.5-10.0.1.el7_9.8", "sssd-ad.x86_64::1.16.5-10.0.1.el7_9.8", "sssd-client.x86_64::1.16.5-10.0.1.el7_9.8", "sssd-common.x86_64::1.16.5-10.0.1.el7_9.8", "sssd-common-pac.x  86_64::1.16.5-10.0.1.el7_9.8", "sssd-ipa.x86_64::1.16.5-10.0.1.el7_9.8", "sssd-krb5.x86_64::1.16.5-10.0.1.el7_9.8", "sssd-krb5-common.x86_64::1.16.5-10.0.1.el7_9.8", "sssd-ldap.x86_64::1.16.5-10.0.1.el7_9.8", "sssd-proxy.x86_64::1.16.5  -10.0.1.el7_9.8", "systemd.x86_64::219-78.0.5.el7_9.3", "systemd-libs.x86_64::219-78.0.5.el7_9.3", "systemd-sysv.x86_64::219-78.0.5.el7_9.3", "unzip.x86_64::6.0-22.el7_9" ],
  "installedRpms" : [ "bind.x86_64::32:9.11.4-26.P2.el7_9.3", "bind-export-libs.x86_64::32:9.11.4-26.P2.el7_9.3", "bind-libs.x86_64::32:9.11.4-26.P2.el7_9.3", "bind-libs-lite.x86_64::32:9.11.4-26.P2.el7_9.3", "bind-license.noarch::32:9  .11.4-26.P2.el7_9.3", "bind-utils.x86_64::32:9.11.4-26.P2.el7_9.3", "curl.x86_64::7.29.0-59.0.1.el7_9.1", "device-mapper.x86_64::7:1.02.170-6.0.3.el7_9.3", "device-mapper-event.x86_64::7:1.02.170-6.0.3.el7_9.3", "7:1.02.170-6.0.3.el7_9  .3::@pdit_ol7_latest/$releasever", "device-mapper-libs.x86_64::7:1.02.170-6.0.3.el7_9.3", "0.4.9-134.0.1.el7_9::@pdit_ol7_latest/$releasever", "0.4.9-134.0.1.el7_9::@pdit_ol7_latest/$releasever", "dhclient.x86_64::12:4.2.5-82.0.1.el7",   "dhcp.x86_64::12:4.2.5-82.0.1.el7", "dhcp-common.x86_64::12:4.2.5-82.0.1.el7", "dhcp-libs.x86_64::12:4.2.5-82.0.1.el7", "dmidecode.x86_64::1:3.2-5.el7", "glib2.x86_64::2.56.1-8.el7", "glibc.i686::2.17-322.0.1.el7_9", "glibc.x86_64::2.  17-322.0.1.el7_9", "glibc-common.x86_64::2.17-322.0.1.el7_9", "glibc-devel.x86_64::2.17-322.0.1.el7_9", "glibc-headers.x86_64::2.17-322.0.1.el7_9", "grub2.x86_64::1:2.02-0.87.0.5.el7", "grub2-common.noarch::1:2.02-0.87.0.5.el7", "grub2  -efi-x64.x86_64::1:2.02-0.87.0.5.el7", "grub2-pc.x86_64::1:2.02-0.87.0.5.el7", "grub2-pc-modules.noarch::1:2.02-0.87.0.5.el7", "grub2-tools.x86_64::1:2.02-0.87.0.5.el7", "grub2-tools-extra.x86_64::1:2.02-0.87.0.5.el7", "grub2-tools-min  imal.x86_64::1:2.02-0.87.0.5.el7", "gssproxy.x86_64::0.7.0-29.el7", "hwdata.x86_64::0.252-9.7.el7", "6.2.0.874-20.0.1.el7_9::@pdit_ol7_latest/$releasever", "6.2.0.874-20.0.1.el7_9::@pdit_ol7_latest/$releasever", "kernel-devel.x86_64::3  .10.0-1160.15.2.el7", "kernel-headers.x86_64::3.10.0-1160.15.2.el7", "kernel-uek.x86_64::4.1.12-124.47.3.el7uek", "kernel-uek-firmware.noarch::4.1.12-124.47.3.el7uek", "kexec-tools.x86_64::2.0.15-51.0.3.el7_9.1", "kpartx.x86_64::0.4.9-  134.0.1.el7_9", "krb5-libs.x86_64::1.15.1-50.el7", "libcurl.x86_64::7.29.0-59.0.1.el7_9.1", "libgudev1.x86_64::219-78.0.1.el7_9.3", "libipa_hbac.x86_64::1.16.5-10.0.1.el7_9.7", "libldb.x86_64::1.5.4-1.el7", "libsmbclient.x86_64::4.10.1  6-9.el7_9", "libsss_autofs.x86_64::1.16.5-10.0.1.el7_9.7", "libsss_certmap.x86_64::1.16.5-10.0.1.el7_9.7", "libsss_idmap.x86_64::1.16.5-10.0.1.el7_9.7", "libsss_nss_idmap.x86_64::1.16.5-10.0.1.el7_9.7", "libsss_sudo.x86_64::1.16.5-10.0  .1.el7_9.7", "libwbclient.x86_64::4.10.16-9.el7_9", "libxml2.i686::2.9.1-6.0.1.el7.5", "libxml2.x86_64::2.9.1-6.0.1.el7.5", "libxml2-python.x86_64::2.9.1-6.0.1.el7.5", "linux-firmware.noarch::999:20200902-999.5.gitd5f9eea5.el7", "lvm2.  x86_64::7:2.02.187-6.0.3.el7_9.3", "lvm2-libs.x86_64::7:2.02.187-6.0.3.el7_9.3", "mokutil.x86_64::15-2.0.9.el7", "nettle.x86_64::2.7.1-8.el7", "nfs-utils.x86_64::1:1.3.0-0.68.0.1.el7", "nss.x86_64::3.53.1-3.el7_9", "nss-sysinit.x86_64:  :3.53.1-3.el7_9", "nss-tools.x86_64::3.53.1-3.el7_9", "openldap.x86_64::2.4.44-22.el7", "openssl.x86_64::1:1.0.2k-21.el7_9", "openssl-libs.x86_64::1:1.0.2k-21.el7_9", "1.0-2.el7::@pdit_ol7_latest/$releasever", "pciutils.x86_64::3.5.1-3  .el7", "pciutils-libs.x86_64::3.5.1-3.el7", "python.x86_64::2.7.5-90.0.1.el7", "python-libs.x86_64::2.7.5-90.0.1.el7", "python-sssdconfig.noarch::1.16.5-10.0.1.el7_9.7", "1:7.9-3.0.1.el7::@pdit_ol7_latest/$releasever", "rsyslog.x86_64:  :8.24.0-57.el7_9", "samba-client-libs.x86_64::4.10.16-9.el7_9", "samba-common.noarch::4.10.16-9.el7_9", "samba-common-libs.x86_64::4.10.16-9.el7_9", "screen.x86_64::4.1.0-0.26.20120314git3c2946.el7", "selinux-policy.noarch::3.13.1-268.  0.1.el7_9.2", "3.13.1-268.0.1.el7_9.2::@pdit_ol7_latest/$releasever", "shim-x64.x86_64::15-2.0.9.el7", "sos.noarch::3.9-5.0.3.el7_9.2", "sssd.x86_64::1.16.5-10.0.1.el7_9.7", "sssd-ad.x86_64::1.16.5-10.0.1.el7_9.7", "sssd-client.x86_64:  :1.16.5-10.0.1.el7_9.7", "sssd-common.x86_64::1.16.5-10.0.1.el7_9.7", "sssd-common-pac.x86_64::1.16.5-10.0.1.el7_9.7", "sssd-ipa.x86_64::1.16.5-10.0.1.el7_9.7", "sssd-krb5.x86_64::1.16.5-10.0.1.el7_9.7", "sssd-krb5-common.x86_64::1.16.  5-10.0.1.el7_9.7", "sssd-ldap.x86_64::1.16.5-10.0.1.el7_9.7", "sssd-proxy.x86_64::1.16.5-10.0.1.el7_9.7", "systemd.x86_64::219-78.0.1.el7_9.3", "systemd-libs.x86_64::219-78.0.1.el7_9.3", "systemd-sysv.x86_64::219-78.0.1.el7_9.3", "unzi  p.x86_64::6.0-21.el7" ]
}
3. Note the kernel before the update.
uname -r
4.1.12-124.47.3.el7uek.x86_64
4. Run the pre-update check for the os.
dbcli update-server -c os -p
{
  "jobId" : "9b02cf04-92a2-4299-8cd0-4ce649b962ec",
  "status" : "Created",
  "message" : null,
  "reports" : [ ],
  "createTimestamp" : "September 24, 2021 14:18:46 PM BST",
  "resourceList" : [ ],
  "description" : "OS Patching Prechecks",
  "updatedTime" : "September 24, 2021 14:18:47 PM BST",
  "percentageProgress" : "0%",
  "cause" : null,
  "action" : null
}
Check if pre-udpate check is successful.
dbcli describe-job -i "9b02cf04-92a2-4299-8cd0-4ce649b962ec"

Job details
----------------------------------------------------------------
                     ID:  9b02cf04-92a2-4299-8cd0-4ce649b962ec
            Description:  OS Patching Prechecks
                 Status:  Success
                Created:  September 24, 2021 2:18:46 PM BST
               Progress:  100%
                Message:

Task Name                                                                Start Time                          End Time                            Status
------------------------------------------------------------------------ ----------------------------------- ----------------------------------- ----------


5. Run the os update.
dbcli update-server -c os
{
  "jobId" : "a7097060-6234-401d-bfd7-1c1fcbb9de85",
  "status" : "Created",
  "message" : null,
  "reports" : [ ],
  "createTimestamp" : "September 24, 2021 15:41:34 PM BST",
  "resourceList" : [ ],
  "description" : "OS Patching",
  "updatedTime" : "September 24, 2021 15:41:34 PM BST",
  "percentageProgress" : "0%",
  "cause" : null,
  "action" : null
}
The first run of the OS update failed with below output..
dbcli describe-job -i "a7097060-6234-401d-bfd7-1c1fcbb9de85"

Job details
----------------------------------------------------------------
                     ID:  a7097060-6234-401d-bfd7-1c1fcbb9de85
            Description:  OS Patching
                 Status:  Failure
                Created:  September 24, 2021 3:41:34 PM BST
               Progress:  78%
                Message:  DCS-10206:Patch bundle conflicts with: Yum Failed to resolve conflict
                  Cause:  Conflict check failed.
                 Action:  Rollback the conflicting patches and retry the operation.

Task Name                                                                Start Time                          End Time                            Status
------------------------------------------------------------------------ ----------------------------------- ----------------------------------- ----------
OS Component Patching                                                    September 24, 2021 3:41:34 PM BST   September 24, 2021 4:22:04 PM BST   Failure
task:TaskSequential_919                                                  September 24, 2021 3:56:45 PM BST   September 24, 2021 4:22:04 PM BST   Failure
Validating OS Patches                                                    September 24, 2021 3:56:45 PM BST   September 24, 2021 4:22:04 PM BST   Failure

After a SR Oracle support confimed that updating is hitting a bug (internal 33403308). After the bug was fixed by Oracle development team ran the command again and OS update was successful.
dbcli update-server -c os
{
  "jobId" : "b1ad604f-7961-4854-a05d-9e43958312b7",
  "status" : "Created",
  "message" : null,
  "reports" : [ ],
  "createTimestamp" : "September 29, 2021 09:32:50 AM BST",
  "resourceList" : [ ],
  "description" : "OS Patching",
  "updatedTime" : "September 29, 2021 09:32:51 AM BST",
  "percentageProgress" : "0%",
  "cause" : null,
  "action" : null
}

dbcli describe-job -i "b1ad604f-7961-4854-a05d-9e43958312b7"

Job details
----------------------------------------------------------------
                     ID:  b1ad604f-7961-4854-a05d-9e43958312b7
            Description:  OS Patching
                 Status:  Success
                Created:  September 29, 2021 9:32:50 AM BST
               Progress:  100%
                Message:

Task Name                                                                Start Time                          End Time                            Status
------------------------------------------------------------------------ ----------------------------------- ----------------------------------- ----------
The issue seems to have been fixed permanently as subsequent OS patching of other DB systems didn't have any issue.

6. Reboot the node and verify the kernel is updated.
uname -r
4.1.12-124.53.5.el7uek.x86_

Related Post
Updating the OS and Patching OCI PaaS DB Using DBCLI